


Reupholstering a Chair With a Blanket (In Less Than Two Hours!)
To Beginners From a Beginner

Hey there! I’m Anne and I do a lot of sewing/fabric repairs and upcyclings! In this post, I’m going to go over the process I used to reupholster my desk chair. As someone who has never venture into upholstery, it was a very easy DIY project, and I really did finish in less than two hours!
To Beginners
Some skills and tools that you’ll need to do this are: a chair to recover, enough fabric to cover your seat (I used an old blanket and had enough left over fabric to cover a second chair), a sewing kit (with needle, pins, thread, and fabric scissors), knowledge on how to do a regular straight stitch or a backstitch (explained in the article), and maybe a bit of an IDon’tKnowWhyIThinkICanDoThisButICan attitude.


Minute of Background
When I first moved back to Ottawa, I had a green and yellow theme for my room in mind. So, when a past roommate offered up this green waiting chair, I jumped at the chance to bring my room’s dream theme to life. However, the more I looked at it, the more it felt like exactly what it is: a waiting room chair. So, when I read a prompt in Sarah Urist Green’s book about choosing an object in one’s house and enhancing a feature of it, I was immediately inspired to reupholster the chair with an old blanket I had lying around.
About a year and a half ago, I put a super soft blanket into my apartment building’s dryer, and she crisped right up. I tried all I could think of to bring back the soft texture of the blanket, but since it had been slightly burned, it remained somewhat crunchy at spots. For this reason, I never used it as a blanket again, but I have been hoping to use it for a sewing project.
Production Phase
The first thing I did was measure out the top and bottom parts of the seat where the fabric would go. Mine measured 19”X33” for the top, and 26”X27” for the seat. I also left a pillow on the seat so that it was more comfortable, which added to the measurements for the seat portion.
I cut the fabric and seam ripped the second layer of the blanket off so that it was just the fabric that I wanted for the chair.
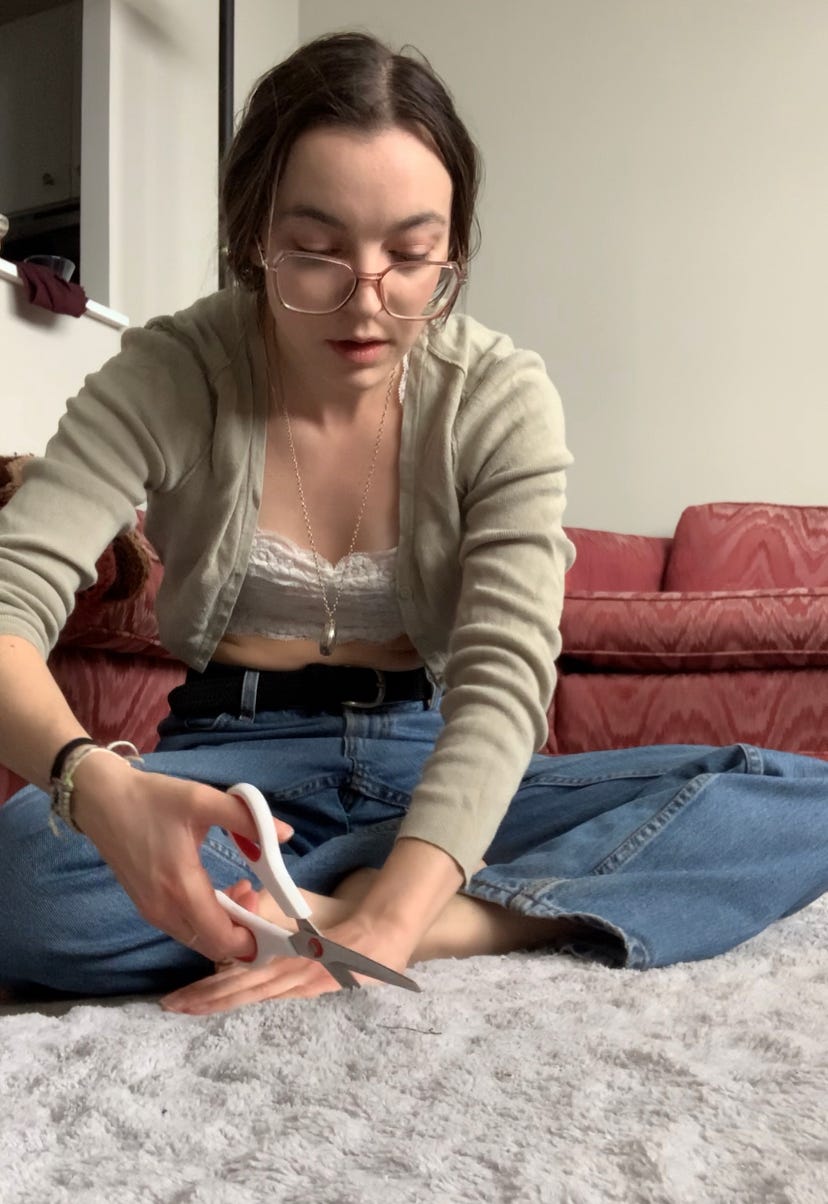
I started with the top part of the chair, and pinned the 19”X33” (plus seam allowance of 2” on both sides) so that I could start sewing. I then used a straight back-stitch to sew, ensuring that the stitching was both tense enough to hold the thick fabric and straight. I started with a simple straight stitch, and I feel like that could have been okay for a thinner fabric, but I just wanted the added security of the back-stitch for this one.


Once the fabric was sewn at the top, I cut the excess fabric and turned it inside out and started to sew it to the chair’s green fabric. However, I quickly realized that the needle would not go trough the fabric since it was so tightly bound to the chair, so I decided to hot glue the blanket to the chair (spoiler alert: it went really well!).


I hot glued the wood right next to the green fabric, then pressed the folded edge of the blanket piece with my fingers for ten seconds each time.
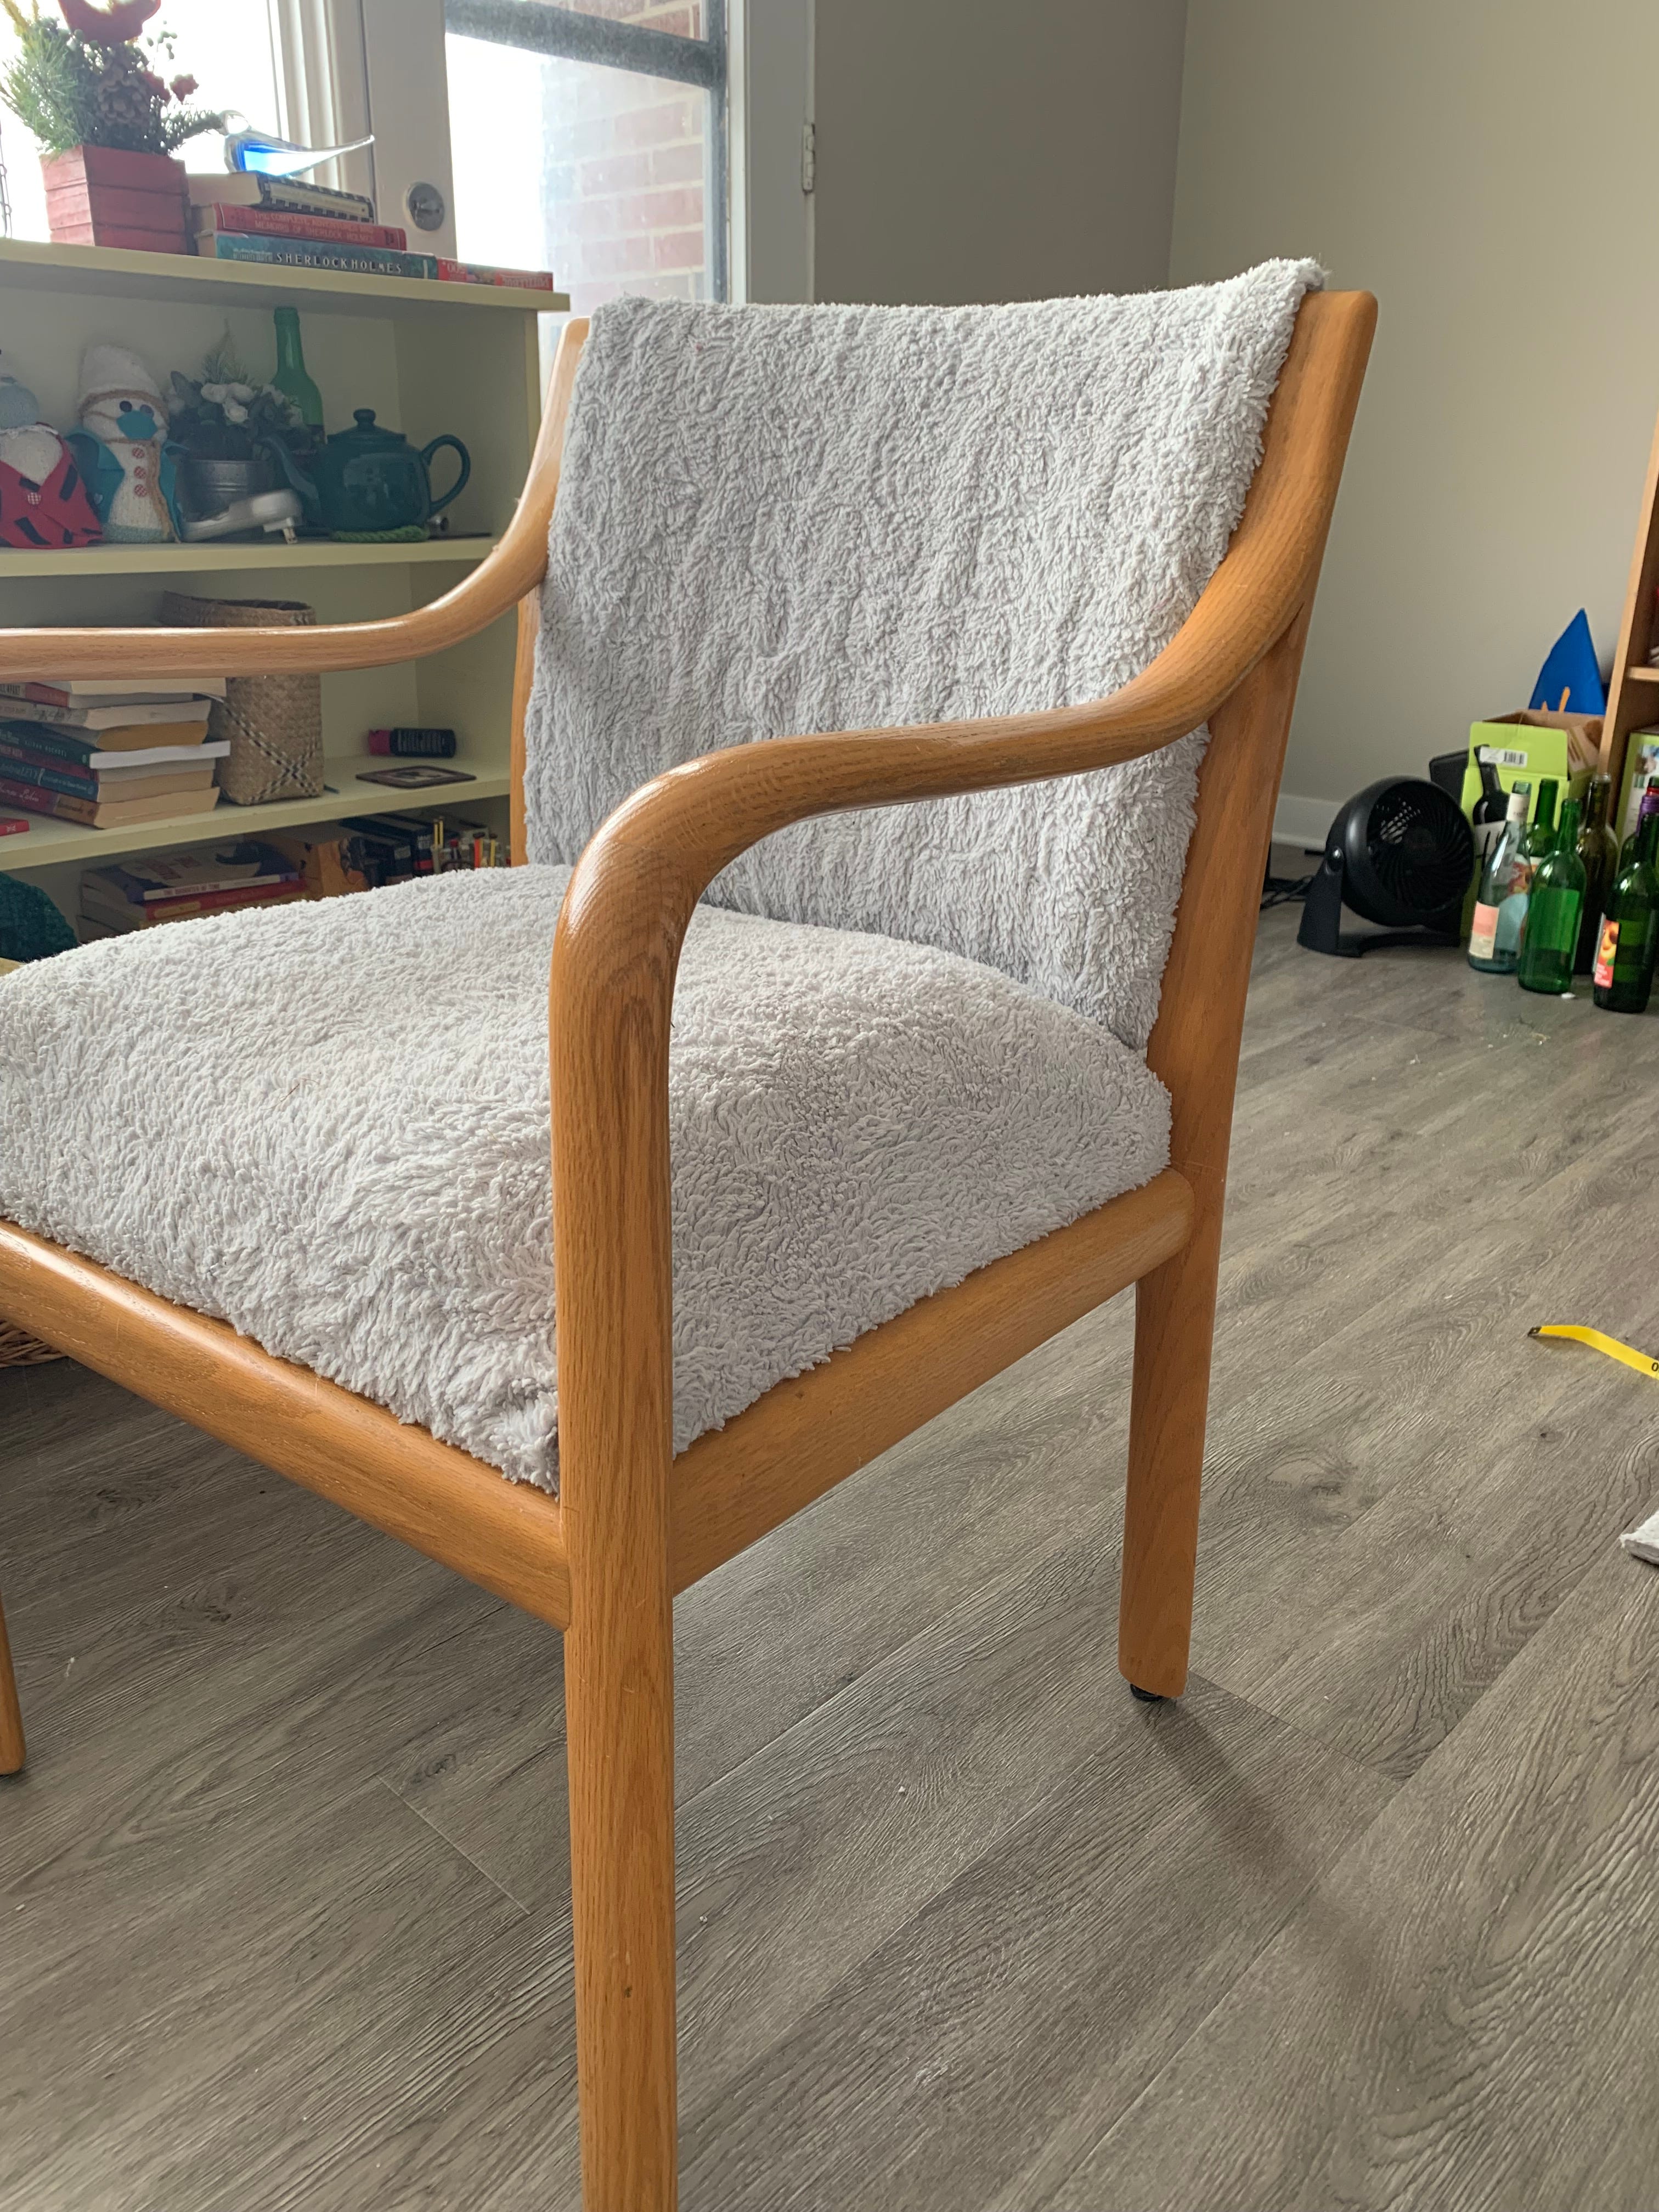
I call this The 9am Chair, because I was finished around 9am the morning that I started it.
From a Beginner
This entire project was essentially: measure, cut, sew, glue, and yet it turned out looking fairly professional! I’m really happy with it, and again, I was a complete beginner when I woke up and decided to do it!
I’m thinking of making a new blog series called “To Beginners From a Beginner”, so be sure to subscribe to that section of my Substack!
Thanks for reading, folks. And I hope that your DIY furniture project goes well! Tag me on Instagram @anne_upcycled so that I can see what you come up with :)